Preparation
Before you start, be sure to gather the following information so that you can go through the installation directly.
Set up your domain name and point it to the server
You need to decide the DNS name that you will use to access the instance and point it to the server. You can use Cloudflare to purchase a DNS name and Northflank as your hosting server.
It’s important do decide this early on as you will need it in the configuration of the environment variables, as well as your Discord Application.
In this tutorial, we will use pubkey.example.com.
Create Discord Application
We will use the Discord app for authentication to log in to the instance and for the bot that will manage the roles.
-
Navigate to the Discord Developer Portal
-
Click
New Application, fill in the form and clickCreate.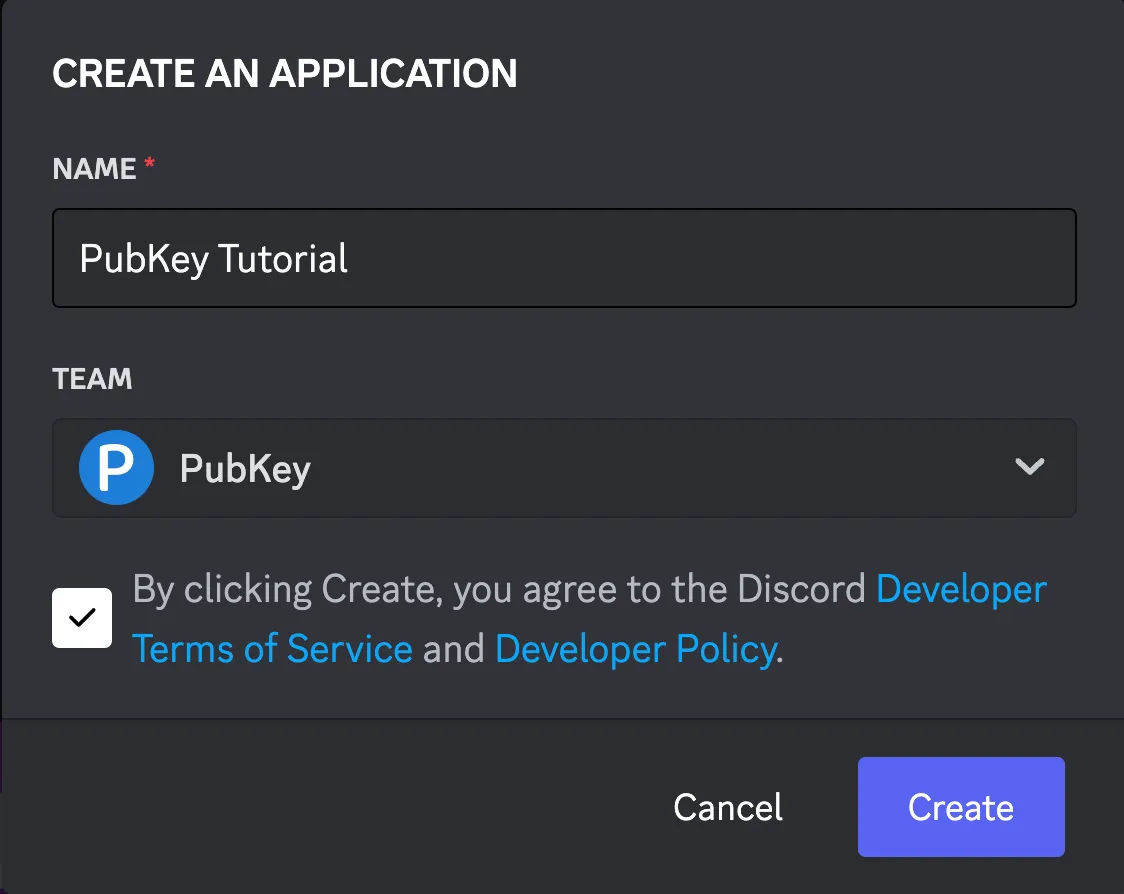
-
Navigate to the
OAuth2screen:- In the
Client Informationsection:- Copy the
Client IDand save the value. This is used asAUTH_DISCORD_CLIENT_IDin the next step. - Click
Reset Secret, agree to the prompt, then copy theClient Secretand save the value. This is used asAUTH_DISCORD_CLIENT_SECRETin the next step.
- Copy the
- In the
Redirectssection:- Click the
Add Redirectbutton and add the following:https://pubkey.example.com/api/auth/discord/callback, making sure you replace the domainpubkey.example.comwith the one you set up in the previous step.
- Click the
- In the
-
Navigate to the
Botpage:-
In the
Tokensection, click theReset Tokenbutton, copy the value and save it. This value is used when configuring the bot once the instance is running. -
In the
Privileged Gateway Intentssection, enable theServer Members Intentand hitSave Changesin the button that popped up.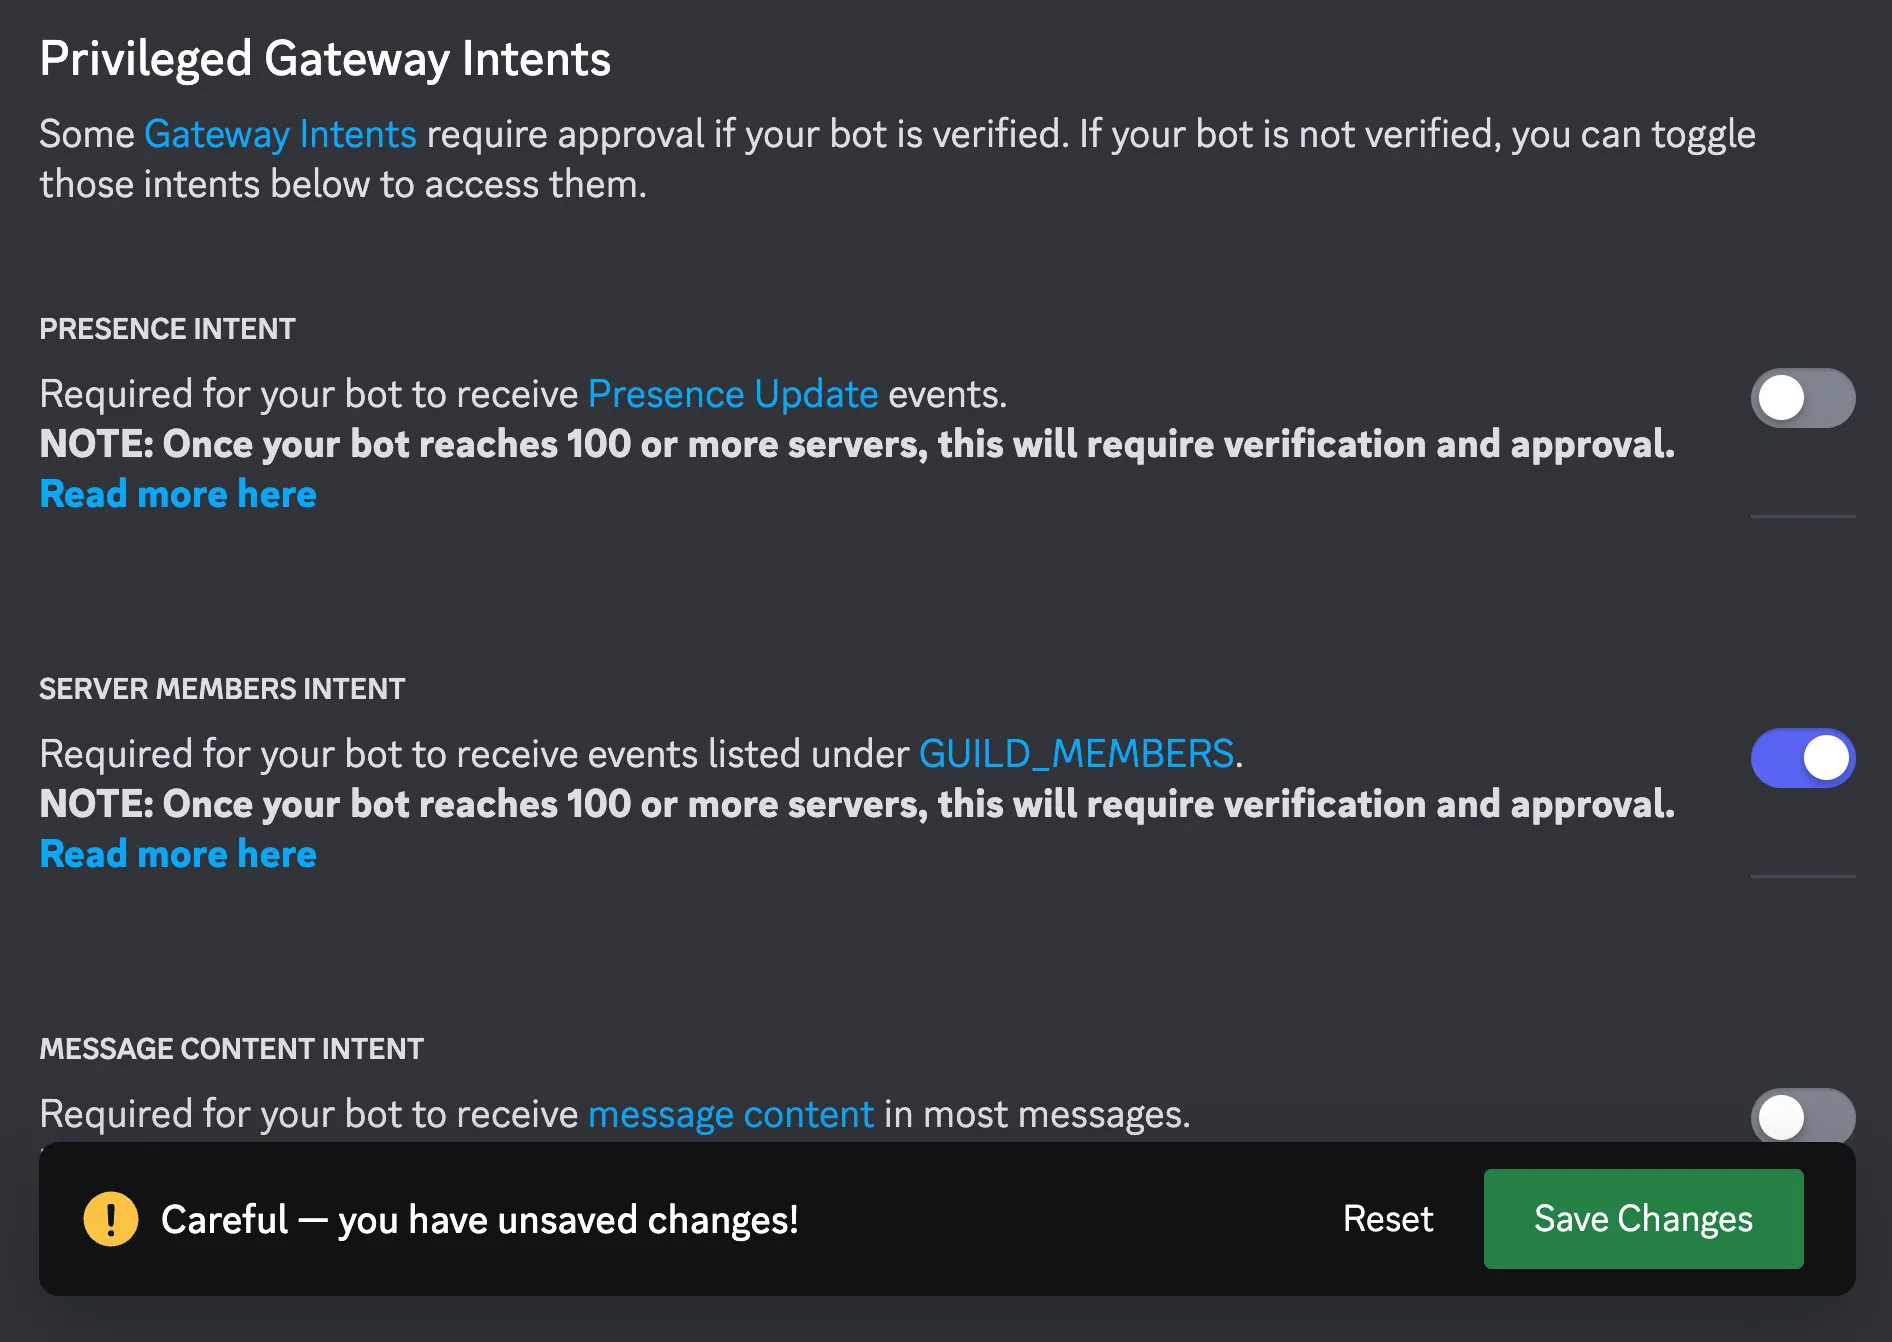
-
-
You have now created the Discord Application with the minimal configuration:
- You saved the
AUTH_DISCORD_CLIENT_IDandAUTH_DISCORD_CLIENT_SECRET. - You configured the
Redirect URL. - You saved the
Bot Token. - You enabled the
Server Members Intent.
- You saved the
-
You can move on to the next step.
Collect environment variables
The environment variables below are the mininal to get a working setup using Discord for authentication.
You can find the complete list of supported variables in .env.example in the project repo.
Before you get started:
- Be sure you set up your domain name.
- Be sure to follow the Discord Application instructions above.
- PubKey Link uses Cloak to encrypt values in the database. Use the web interface or CLI to generate the keychain and master key.
- By default, the instance will run on port 3000. You can override this by using the
PORTenv variable, but most hosting providers will do this for you.
| Variable | Example | Description |
|---|---|---|
| API_URL | https://pubkey.example.com/api | FQDN to the API with the /api path |
| AUTH_DISCORD_ADMIN_IDS | 123456789,987654321 | Comma-separated list of user ids of the Discord users that get the Admin role on login. |
| AUTH_DISCORD_CLIENT_ID | 123456789123456789 | Discord OAuth2 Client Secret collected in the previous step. |
| AUTH_DISCORD_CLIENT_SECRET | XYZ_ABC-123_456 | Discord OAuth2 Client Secret collected in the previous step. |
| CLOAK_MASTER_KEY | k1.aesgcm256.abc-defghi-jk= | Cloak master key as mentioned above. |
| CLOAK_KEYCHAIN | v1.aesgcm256.123abc.123-abc.defgi | Cloak keychain as mentioned above. |
| DATABASE_URL | postgres://user:pass@host:5432/db | Postgres connection string |
| JWT_SECRET | some random string | The JWT secret, you can generate a good random string with openssl rand -hex 32 |
| REDIS_URL | redis://host:6379 | Redis connection string. |
| SOLANA_MAINNET_ENDPOINT | https://mainnet.helius-rpc.com/?api-key=<API KEY> | The RPC endpoint for Mainnet. You can start with the free one from Helius |